We’ve all been there—you’re deep into your work, confidently painting a sunset and then… whoops! a brush stroke goes rogue and you’ve somehow created an abstract nightmare. But don’t worry, mistakes happen to everyone, and the beauty of acrylics is that they’re super forgiving.
So, let’s dive into some tips and tricks for fixing those painting errors without losing your cool. Ready? Let’s turn those “oops” moments into opportunities!
1. The Magic of Layers: Paint It Over
One of the best things about acrylic paint is that it dries fast, which means you can easily paint right over any mistakes. Made a weird shape or color that’s totally not working? No problem! Let it dry (which only takes a few minutes) and then grab your brush and paint right over it. It’s like hitting the undo button in real life.
The beauty of this layering technique is that it’s incredibly forgiving. If you’ve ever found yourself staring at a blob of paint that’s completely out of place, don’t stress. Just wait for it to dry—seriously, give it a few minutes—and then go in with your brush and a fresh layer of paint. You’ll find that the mistake disappears, and you’re back on track in no time.
Now, if the mistake is big or the color is really bold (hello, neon orange where you wanted a soft sunset yellow), you might need a couple of layers to cover it up completely. Don’t rush it! Let each layer dry before applying the next. This might sound tedious, but trust me, it’s worth it. The extra layers not only hide the error but can also add a richness and depth to your painting that wouldn’t have been there otherwise.
2. Use Gesso to Reset
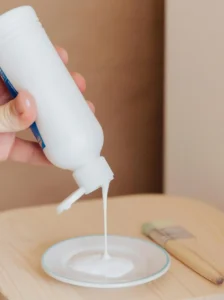
Okay, so the mistake is pretty major, and simply painting over it isn’t doing the trick. Maybe you’ve got a bold color that refuses to be tamed or a section of the painting that just feels off no matter how many layers you’ve tried. Enter gesso, your acrylic painting reset button. Gesso is typically used as a primer to prep your canvas before you start painting, but it’s also a secret weapon for covering up large areas of your painting that need a do-over.

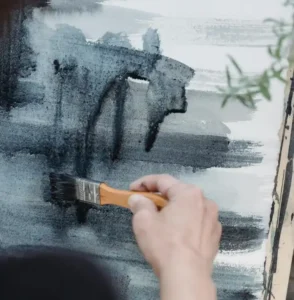
Just brush a layer (or two, depending on how much coverage you need) over the area in question. What you’re doing is essentially erasing that part of your painting, giving yourself a clean slate to work with. Once the gesso dries—which doesn’t take long—you’re left with a fresh, blank canvas in that spot, ready for you to take another shot at it.
The beauty of using gesso is that it’s like starting over in just that one spot, without scrapping the whole painting. Imagine you’ve painted a landscape, and the sky is perfect, but the trees are a mess. Instead of tossing the whole canvas and starting from scratch, you can use gesso to cover just the trees. Once it’s dry, you can repaint the trees without worrying about the sky. Super handy, right?
And don’t worry about the gesso showing through your new layers of paint. Acrylic paint adheres beautifully to gesso, so once you’ve repainted, no one will ever know there was a mistake there to begin with.
3. Wet Paint Techniques
If you’ve made a stray brushstroke or splattered paint where you didn’t want it, grab a damp cloth or sponge. Damp, not soaking—just enough to lift the paint. Gently dab (don’t rub!) the area to remove the excess paint without smudging. This quick fix is perfect for cleaning up small mistakes before they dry.
When you need to soften harsh lines or blend a color that’s too intense, a wet brush can help. Dip your brush in water, blot it slightly, and then blend the mistake into the surrounding paint. This technique smooths out rough transitions and helps your colors flow together naturally, turning a mistake into a beautiful gradient.
For paint that’s wet but starting to dry, use a dry brush to lift off excess paint. Lightly drag the brush over the area to lighten it or remove unwanted paint, kind of like erasing. This technique is great for toning down colors or fixing overworked areas.

4. Blend It Out
Sometimes, a mistake isn’t so much about the wrong color or shape but about harsh lines or awkward transitions. In that case, blending is your best friend. Grab a clean, slightly damp brush, and gently blend out the edges of your mistake into the surrounding area.
This technique works especially well for fixing things like skies, backgrounds, or anywhere you want a smooth, gradual transition. You can also use this trick to soften shadows or smooth out color gradients that aren’t quite right.
5. Color Matching
Sometimes, you just need to fix a small spot, but getting the exact color match feels like chasing a rainbow.
Instead of trying to mix the exact color from scratch, start by creating a transition shade. Take a tiny amount of the color that’s causing the problem and mix it with the correct color you want to achieve. This blend doesn’t have to be perfect; it’s meant to bridge the gap between the two shades. Once you have this transition shade, use it to paint over the edges where the mistake meets the corrected area.
This method helps to softly blend the old and new colors together, making the transition smooth and seamless. The eye naturally overlooks small variations in color, especially when they’re blended well. By using a transition shade, you avoid harsh lines or noticeable patches where the repair was made. Instead, the area will look like it was part of the plan all along.
This technique is particularly useful when working with gradients or subtle color shifts, where an exact match is nearly impossible to achieve. It’s also a lifesaver for those moments when you accidentally cover up a highlight or shadow and need to restore it without starting from scratch.
So, next time you’re stuck trying to match a color perfectly, remember that you don’t have to. A well-blended transition shade will do the trick. Your eye won’t notice the difference, and it’ll look seamless.
6. Knife to the Rescue
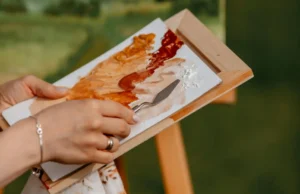
Palette knives aren’t just for mixing paint; they can also scrape off dried mistakes. Gently slide the knife under the dried paint and lift it away. It’s like performing surgery on your canvas—precise and satisfying. After scraping, you can reapply your paint and carry on like nothing happened.

7. Detail Brushes for Precision
When you’re dealing with intricate areas of your painting, even the smallest mistake can feel like a big deal. Whether it’s a tiny slip in a detailed pattern, or an errant line in a part of your painting, fixing these small errors requires a delicate touch. This is where detail brushes come to the rescue.
Detail brushes are like the precision tools in your artist’s toolkit. With their fine, pointed tips, these brushes allow you to correct small mistakes with accuracy, without disturbing the surrounding areas. It’s like using a scalpel instead of a hammer—perfect for those moments when you need to make tiny adjustments without causing collateral damage to the rest of your work.
8. Get Creative: Turn Mistakes into Features
Not all mistakes need to be “fixed.” Sometimes, the best solution is to roll with it and turn that error into a feature of your painting. Rather than seeing it as a flaw, imagine it as a part of your composition. Maybe it becomes a burst of energy in the background, adding texture and depth that wasn’t originally planned. Or consider that smudge that found its way onto your canvas—it could evolve into a shadow that adds dimension, or a highlight that brings a new focus to your work.
Mistakes are sometimes just opportunities in disguise. By shifting your perspective and viewing them as happy accidents, you can unlock new avenues of creativity. This approach encourages you to experiment and take risks, which can lead to unexpected and exciting results.
So next time something goes awry, don’t panic. Instead, get creative see if you can incorporate the mistake into your artwork in a way that enhances the overall piece. You’d be surprised how often a “mistake” leads to something unexpectedly cool and unique.
9. Step Back and Reevaluate
Sometimes what seems like a mistake up close isn’t really a big deal when you step back and look at the whole painting.
Take a few steps back and view your painting from a distance, or even leave it for a day and come back with fresh eyes. You might realize that the “mistake” actually adds character, or it’s not as noticeable as you thought.

Taking a break and reassessing can save you from overcorrecting something that doesn’t need to be fixed at all.
Plus, it gives you a chance to appreciate the overall progress of your work!
10. Don’t Be Afraid to Experiment
Remember, painting is all about exploration and creativity, so don’t be afraid to experiment when fixing mistakes. Try different techniques, mix new colors, or add unexpected elements. Sometimes the best discoveries happen when you’re trying to fix something that went wrong.
Also don’t be afraid to try unconventional methods to fix your mistakes. Some artists use rubbing alcohol to lift paint, while others might use a toothbrush for texture effects. The key is to stay calm, keep experimenting.
And hey, even if the experiment doesn’t work out, you’ve still learned something valuable for your next painting. So embrace the process, and don’t be too hard on yourself!
11. Know When to Let It Go
Finally, sometimes the best fix is to just let the mistake be. Every painting has its quirks, and not every little thing needs to be corrected. Those imperfections are what make your art uniquely yours.
If you’re like me and you find yourself obsessing over every tiny detail, take a step back and remember that art isn’t about perfection—it’s about expression.
So if that mistake isn’t ruining the overall vibe of your painting, maybe it’s best to just let it be and move on. After all, your art is a reflection of you, imperfections and all.
So there you have it—some handy tips for fixing acrylic painting errors without stressing out. Remember, every mistake is just a stepping stone to becoming a better artist, so don’t be afraid to mess up. The more you paint, the more you learn, and the better you’ll get at turning those “oops” moments into something awesome.
The next time your painting goes off the rails, don’t stress—just grab your gesso, brushes, and maybe a cup of coffee, and get to work. Happy painting!
